Services Provided
DIY
Experience and Good Comments
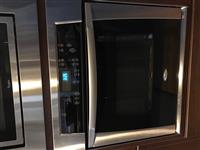
Have you ever experienced a broken electric wall oven? Even though the display and control panel works ok, the bake elements never get heated. If this is the problem you just encountered, this review will be helpful to you!
Before you consider replacing a new oven (which may cost you a couple of thousand dollars), you could do some troubleshooting yourself. You never know, you could save a couple of thousand dollars by fixing the problem yourself.
Here are the steps I used to do troubleshooting.
1. Take oven door out. You could search youtube.com and follow the correct steps to remove the door.
2. Check that the control panel is working as expected. Check if you can chose baking modes, temperature and timer settings.
3.If everything above works, the problem could be related to baking elements.
4. Detach oven frame and fixture. You will be able to move the oven out from a wall cabinet.
5. This is the most important step because you could get electrocuted if you ignore this step! The oven wiring is connected to your house's electric source. The easiest way to protect yourself from electrocution is to make sure you turn off the switch properly. Go to the garage and search for your electric control box. Normally, the box has a number of switches which control electric sources for various components, such as the dishwasher, range, dryer, oven, etc. Identify the switch for controlling the oven and make sure you turn off the power to your wall oven!!
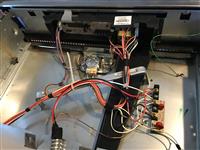
6. Once you turn off the electric power to your oven, you can start troubleshooting the baking element as mentioned before. Now you need to find a multi-meter. The first step is to detach the cables that connect to the baking elements. You can unscrew and take the baking elements out. As shown in the pictures below, you can use the multi-meter to measure electric resistance for the baking elements. If electric resistance is a huge value, that means the baking element is broken and no electric current can flow through the baking elements. In my case, both upper and bottom baking elements had relatively small values. That means the baking elements are ok in my case.
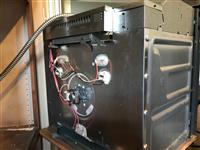
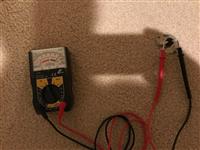
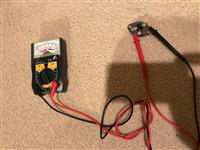
7. The next spot you can check is the thermal fuse. It is located at the back of oven (shown in a picture below). Detach the thermal fuse. Then use the multi-meter to check electric resistance. As you can see from pictures below, the bad thermal fuse has infinite resistance. That's the problem!!! I ordered a new thermal fuse from Amazon using this link, https://www.amazon.com/gp/product/B002AC3UD0/ref=oh_aui_detailpage_o06_s00?ie=UTF8&psc=1. It is cheaper than purchasing from the Whirlpool parts web site.
8. As you can see from the picture below, the new thermal fuse I ordered from Amazon has zero electric resistance. I just replaced the thermal fuse. Then I reconnected the electric wires back and put the oven back inside the cabinet. The last step is to put the oven door back and turn oven the control switch on from the control box in my garage.
9. I was so excited to test if I fixed the problem. It worked!! I fixed the problem and I saved a couple of thousands.
Not-So-Good Comments
None

