For DIYers

Address
Redmond, WA 98052
Contact Info
Yourself (Work)
Email Address
Web Site


Service Area
Greater Seattle Area
Business Hours

In Business Since
License No
Bonded
N/A
Insured
N/A


by Zheng M. (Company User | Ranking:Principal Homeowner)
Last update on 06/03/2019  

Services Provided

Won the contested hearing for a traffic ticket

Experience and Good Comments

I got a traffic ticket on 06/2x/2010 from an officer on the spot, because the officer said that I ran the red light. The location was on 40TH ST, crossing the 520.

There were some options after getting the traffic ticket:
1. Pay the full amount // about $124 at that time
2. File mitigation request // by given a sound reason, Judge may reduce some amount, say $30 or $50.
3. File the contested request
3.1 Contest by yourself // Don’t bet on the police man is No-Show in the courtroom because there will be a policy representative for all traffic cases on the court day. It is true for Redmond City.
3.2 Contest by an attorney // Per my knowledge, $250 is the bottom price for an experienced attorney. Why bother to pay $250 (at least) to save $124? I don't know the cost to involve the help from Microsoft Group Legal, so i leave it to others to comment.

I thought I ran the yellow light, not the red light. After some researching, I decided to attend the contested hearing by myself, without an attorney. I sent mail to Redmond Prosecuting Attorney for the policy cam video record. They refused to provide it to me, until my second mail, see my mail content in the section below.

The video showed nothing related to my case. It didn't prove that I ran the red light. It started to record at the next intersection, the one next to what it should capture, which happens to have a green light.

I went to the court with it and both the judge and prosecutor got confused about the video. My case was dismissed.

Besides my victory, I also learned a lot from my court experience. Per my observations, the defendants got more chance to win on that day. There were 6 cases without an attorney involved, including mine.

#1. A parking ticket. It was dismissed because the 2-hour parking sign was moved recently, so both judge and prosecutor agreed to dismiss the case.

#2. Didn’t stop at the 4-way stop sign. It is sustained. // I don’t think the defendant prepared good solid evidence other than verbal argument.

#3. A ticket based on traffic camera picture. It was dismissed because the driving person is not the defendant, it is his brother.
#4. Before the defendant said anything, this case is withdrawn by the prosecutor. // this mean the defendant only needs to show up in the court room.

#5. (I didn’t remember the details because I was preparing for mine case). It was dismissed after the defendant shows the print-out map and explain why it is not a violation.

#6. My case. It was dismissed after I showed the judge the video captured by the police car.

In summary, based on my observation, the chance to win a case with your own effort on that day was 5/6= 83.3%! So go to the court room to give a try next time.

Not-So-Good Comments

********************
***my 2nd mail***
********************

Dear Redmond Prosecuting Attorney xxx,
I, Zheng xxxxx, got a traffic ticket on 06/2x/2010 from an officer on the spot, because the officer said that I ran the red light. The IR No of the ticket is IR135xxx.

I filed a request for Contested Hearing. For the hearing, I filed the request a copy of the citing officer’s sworn statement and request for a copy of video or photographic evidence the prosecutor proposes to introduce at trial on 07/2x/2010.

However, I got a mail from you on 07/2x/2010, saying:
‘In accordance with IRLJ 3.1(b) Discovery, the City has responded to your discovery request by herein providing “a copy of the citing officer’s sworn statement with the names of any witnesses not identified in the citing officer’s sworn statement.” No other discovery is required under IRLJ 3.1(b) and therefore no additional discovery will be provided.’

I doubled checked the official IRLJ3.1, available at http://www.courts.wa.gov/court_rules/adopted/IRLJ3.1.doc. It says:
‘(b) Discovery. Upon written demand of the defendant at least 14 days before a contested hearing, filed with the court and served on the office of the prosecuting authority assigned to the court in which the infraction is filed, the prosecuting attorney shall at least 7 days before the hearing provide the defendant or the defendant's lawyer with (1) a copy of the citing officer's sworn statement (2) a copy of video or photographic evidence the prosecutor proposes to introduce at trial, unless in reply to the discovery request the prosecutor provides the address to a website where such evidence is accessible to the defendant; and (3)…’

Therefore, I have the right to ask for IRLJ 3.1(b) (2) - a copy of video or photographic evidence the prosecutor proposes to introduce at trial, or an alternative web site showing the evidence. I asked this because on 06/2x/2010, after the officer xxxxx xxxxx stopped me, he told me that he had video evidence of my violation which I don’t agree with.

Best Regards,

Zheng xxxxx
On 07/2x/2010
P.S. I attached a copy of my request on 07/2x/2010, which included my request for video or photographic evidence.

Overall:
Quality:
Price:
Professionalism:
Service Cost $ Log on to view it
Finished on:8/18/2010
Was Hired:Yes
Recommended: Yes
Why HomeHomeYeah Is Unique?
Views: 4540+   Is this review helpful?  

by Zheng M. (Company User | Ranking:Principal Homeowner)
Last update on 02/20/2018  

Services Provided

bought the part online and fixed the heating and/or air conditioning system

Experience and Good Comments

I lived in an apartment. The central 24x7 heating and/or air conditioning system uses Honeywell Sweat Zone Valve to auto adjust the hot/cold water flow.

One of the old valves, Honeywell V8043A1011, failed to function after 15 years. After inspection, the serviceman told me either to spend $600 to let the repair company fix, or i can buy the parts from www.supplyhouse.com for $72 and do myself.

I chose the latter, and followed some youtube video to fix. It works well with the new part now.

Not-So-Good Comments

None

Overall:
Quality:
Price:
Professionalism:
Service Cost $ Log on to view it
Finished on:1/15/2018
Was Hired:Yes
Recommended: Yes
Why HomeHomeYeah Is Unique?
Views: 2500+   Is this review helpful?  

by Jason (Company User | Ranking:Homeowner 2)
Last update on 12/30/2017  

Services Provided

DIY

Experience and Good Comments

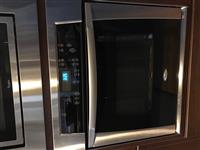
Have you ever experienced a broken electric wall oven? Even though the display and control panel works ok, the bake elements never get heated. If this is the problem you just encountered, this review will be helpful to you!

Before you consider replacing a new oven (which may cost you a couple of thousand dollars), you could do some troubleshooting yourself. You never know, you could save a couple of thousand dollars by fixing the problem yourself.

Here are the steps I used to do troubleshooting.

1. Take oven door out. You could search youtube.com and follow the correct steps to remove the door.

2. Check that the control panel is working as expected. Check if you can chose baking modes, temperature and timer settings.

3.If everything above works, the problem could be related to baking elements.

4. Detach oven frame and fixture. You will be able to move the oven out from a wall cabinet.

5. This is the most important step because you could get electrocuted if you ignore this step! The oven wiring is connected to your house's electric source. The easiest way to protect yourself from electrocution is to make sure you turn off the switch properly. Go to the garage and search for your electric control box. Normally, the box has a number of switches which control electric sources for various components, such as the dishwasher, range, dryer, oven, etc. Identify the switch for controlling the oven and make sure you turn off the power to your wall oven!!

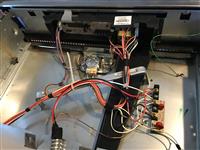
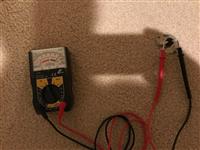
6. Once you turn off the electric power to your oven, you can start troubleshooting the baking element as mentioned before. Now you need to find a multi-meter. The first step is to detach the cables that connect to the baking elements. You can unscrew and take the baking elements out. As shown in the pictures below, you can use the multi-meter to measure electric resistance for the baking elements. If electric resistance is a huge value, that means the baking element is broken and no electric current can flow through the baking elements. In my case, both upper and bottom baking elements had relatively small values. That means the baking elements are ok in my case.

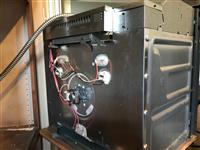
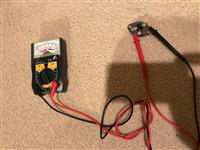
7. The next spot you can check is the thermal fuse. It is located at the back of oven (shown in a picture below). Detach the thermal fuse. Then use the multi-meter to check electric resistance. As you can see from pictures below, the bad thermal fuse has infinite resistance. That's the problem!!! I ordered a new thermal fuse from Amazon using this link, https://www.amazon.com/gp/product/B002AC3UD0/ref=oh_aui_detailpage_o06_s00?ie=UTF8&psc=1. It is cheaper than purchasing from the Whirlpool parts web site.

8. As you can see from the picture below, the new thermal fuse I ordered from Amazon has zero electric resistance. I just replaced the thermal fuse. Then I reconnected the electric wires back and put the oven back inside the cabinet. The last step is to put the oven door back and turn oven the control switch on from the control box in my garage.

9. I was so excited to test if I fixed the problem. It worked!! I fixed the problem and I saved a couple of thousands.

Not-So-Good Comments

None

Overall:
Quality:
Price:
Professionalism:
Service Cost $ Log on to view it
Finished on:12/9/2017
Was Hired:Yes
Recommended: Yes
Why HomeHomeYeah Is Unique?
Pictures
Views: 2680+   Is this review helpful?  

by Ding L. (Company User | Ranking:Homeowner 2)
Last update on 10/06/2017  

Services Provided

The service provider was not hired.

Experience and Good Comments

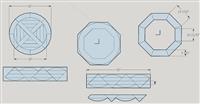
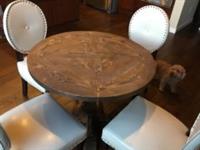
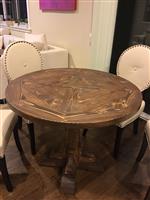
Why spend multi-hundreds of dollars on a plywood dining table where you can make your own solid wood table for ~$100?

This project took me about 1 week to construction and 2 weeks spent waiting on polyurethane to dry.

Tools:

Table Saw
Miter SAw
Router (if you have a router table, even better)
Nailer
Drill
Kreg Pocket Hole Jig
Sander

1. determine the size of your table. I highly recommend to draw it out so you can plan on the amount of wood you need.
2. Start off by making a cross, make sure the joint is 90 degrees, otherwise you’ll be filling lots of gaps. Make sure the cross covers larger than the middle round piece. Find the center point of the cross
3. Fill in the "triangles" to the sides of your cross, essentially making somewhat of a square
4. Find the center point of the cross. This will be used with an axle to turn the square into a perfect circle
5. Add an axle to the center point. There are two ways to make a perfectly round circle:
A) mount a cutting tool with a long board, attach the other end of the board to the center axle, rotate and cut. You can use either the jig saw or a router with flush trim bit to do it this way
B) mount your tool somewhere, and then rotate the work piece via the center axle. You can use tools such as router + router table or a band saw for this type of cuts. If you are patient enough, you can even use a table saw. just need to slowly raise the cutting blade
6. To make the outer ring, start off by making an octagon.
7. make a hole in the center of the octagon where the size of the hole matches with the round surface you made in earlier step
8. secure the middle round piece to the hole of the octagon with screws or wood glue
9. Adjust the radius from the center axle and use the same cutting method, cut the octagon into a round piece using the same axle you used before
10. Sand, stain, apply polyurethane. highly recommend to get multiple coats of polyurethane to make sure the surface can handle the daily use.
11. Add the surface to the base. The base is usually much easier to make compare to the round table surface.

Link to more pictures by steps:

http://cn.dingsworkshop.com/solid-wood-round-dining-table/

Not-So-Good Comments

None

Overall:
Finished on:10/4/2017
Was Hired:No
Recommended: Yes
Why HomeHomeYeah Is Unique?
Pictures
Views: 3180+   Is this review helpful?  

by Ding L. (Company User | Ranking:Homeowner 2)
Last update on 10/06/2017  

Services Provided

The service provider was not hired.

Experience and Good Comments


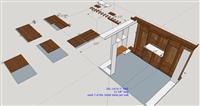
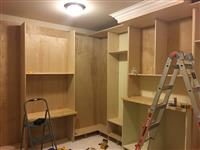
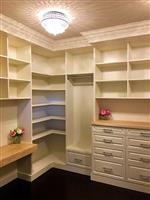
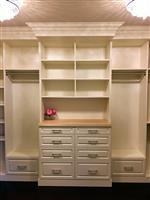
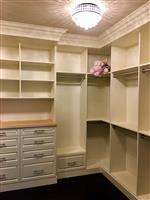
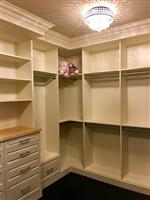
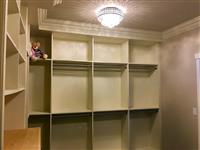
Tools I used:
- Table Saw
- Miter Saw
- Random Orbit Sander
- Nail gun
- Cloth Iron (for putting on edge banding)
- Drill and impact driver
- Pocket hole jig
- Ladder
- Knife, hammer, screw driver, ruler, tape measure, etc.
- Level
- Stud finder

Materials:
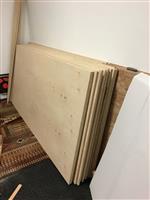
- 13 sheets of birch plywood. 4'x8' $50 each
- 9 sheets of 5mm plywood underlayment. 4'x8' about $12 each
- birch edge banding. $4 each
- Sold bamboo flooring. $350
- 2 x Sherwin Williams Primer. about $50 each with coupon
- 4 x Sherwin Williams Pro classic paint. about $50 each with coupon
- Select Pine boards (for drawers). ~$35 each
- base board and crown molding. price varies depends on the style
- nails, screws, Spackle, caulk, etc. ~$100
- 5 x brushed nickle heavy duty closet rod. $30 each
- closet rod sockets. $6 each
- soft close drawer slide. ~about $14 each
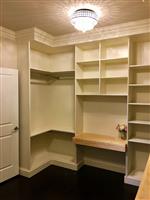
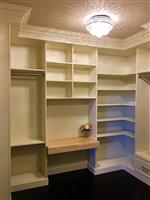
- Chandelier. cost varies

Major steps:
1) Buy materials. Homedepot has truck rental @ $19 for the first 75 minutes
2) It helps to draw your design so you know the dimensions, but do not trust these numbers religiously because the walls in the closet are not 100% straight.
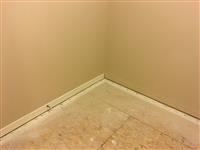
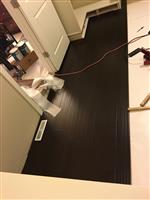
3) Tear down the existing walk in closet. Because the closets are going to be built-in, removal of the carpet is recommended even if you eventually want carpet instead of floor. The idea is to cut-to-fit carpet/floor after everything's built, so that in the future if carpet/floor needs to be changed, you don't face the trouble of having heavy closets sitting on top of your carpet.
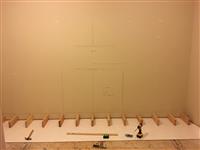
4) lay the support beams. at first I drew the dimensions on the wall but eventually felt it was a waste of time.
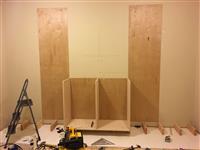
5) Cut wood and install! I used iron-on birch edge banding to cover up the sides of plywood. Note the baseboard are left out intentionally. need to provide room so that you can tuck in a little extra carpet/flooring under the base board.
6) Install crown molding.
7) Fill holes, sand rough surfaces. Mask walls and ceiling. Prime and paint. Prime & paint before carpet/floor installation so you don't need to mask out the bottom.
8) Install carpet/floor.
9) Install baseboard, fill holes, paint baseboard.
10) Make and install drawers
11) Make, paint, install drawer face plate (refer to my drawer face plate DIY post)
12) Install chandelier. celebrate.

Link to progressive steps & more pictures:

https://dingsworkshop.com/walk-in-closet-remodel/

Not-So-Good Comments

None

Overall:
Finished on:1/15/2017
Was Hired:No
Recommended: Yes
Why HomeHomeYeah Is Unique?
Views: 4240+   Is this review helpful?  

by Jason (Company User | Ranking:Homeowner 2)
Last update on 06/12/2017  

Services Provided

The service provider was not hired.

Experience and Good Comments

I have done the replacement myself today for the two faucet in a bathroom in my house. It took some time initially and figured out how to do the replacement correctly. I am glad I made it!

Here are the procedures for your reference.
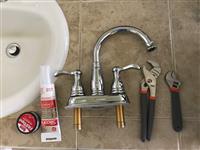
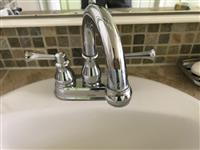
1. You need to know type of faucet for the replace. I started with browsing the catalog of Home Depot web site and found I need to get a new faucet and the model is Delta 25984LF. Please see the pictures for the mode details.
2. Prepare the proper tools for the replacement. This is the most important steps. Without right tool, you will be very frustrated when you attempt to replace the faucet.
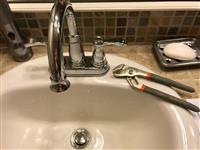
3. I found the most useful to complete the replace is the tool called "Groove join pliers". Without it, it will very hard to loosen drain connectors.
4. Make sure you turn off water supply for both hot and cold water
5. Loosen two locknuts under the faucet that needs to be replaced.
6. Remove locknuts and detach water supplies.
7. Remove pop-up assembly.
8. You should be able to pull out old faucet.
9. Then remove stopper once pop-up assembly is removed.
10. It will be a bit tricky to take out flange screw nut.
12. Now use groove join pliers to loosen drain connectors under the sink.
13. Push up rod under the sink. Use groove join pliers to lock the rod under the sink and use a lock plier to loosen flange screw nut. Once you are able to remove flange screw nut. You are done to remove everything for the old faucet.
14. Apply silicon at the bottom of faucet gasket. Use locknuts to lock new faucet.
15. Insert lift rod through faucet and into strap. Apply silicon to underside of flange.
16. Connect pop-up assembly with rod.
17. Use groove join pliers to tighten drain connector.
18. Connect water supplies.
19. Adjust pop-up

That's it! You can do it yourself.

Good luck and have fun!

Not-So-Good Comments

None

Overall:
Finished on:6/11/2017
Was Hired:No
Recommended: Yes
Why HomeHomeYeah Is Unique?
Pictures
Views: 3710+   Is this review helpful?  

by Ding L. (Company User | Ranking:Homeowner 2)
Last update on 01/13/2017  

Services Provided

The service provider was not hired.

Experience and Good Comments

Before you start:
- Make sure your table saw and/or miter saw are calibrated
- Get some scrap wood to test your cut before using the desired material. Whatever solid wood you choose, it's likely more expensive than a piece of scrap wood. You can use plywood for testing, but do NOT use plywood for the final product.

Cost:
- Depends on the kind and quality of your chosen wood. Do NOT use plywood, trust me!

Tools I used:
- Table saw (to do precise dimension cuts; to make tongue for the middle piece; to make dado/groove for the side pieces)
- Optional: Miter saw (to cut perfect 45 degree angles; this can also be done on the table saw if you have a precise miter gauge)
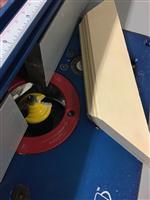
- Router with whatever artistic bit you like for the design
- Optional: Router table (makes routing parts much easier)
- Random orbit sander with 80 & 120 grit sand paper (smoothing the surface)
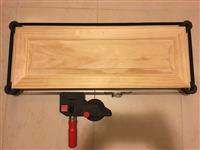
- Strap Clamp
- Wood glue
- Wood filler
- Tack cloth (final dust removal & wipe off)
- Finish of your choice (lacquer, polyurethane, primer, paint etc.)

Major steps:
1) Measure the size of the drawer face / cabinet door you need to make. Decide how wide you like your edge pieces to be (I used 2 inches).
2) Based on your determined edge width, determine the size you need to cut for the middle piece. Be sure to factor in the size for the tongue. For example: If I'm making a 36 inch x 24 inch cabinet door, with 2 inch wide sides and 1/8 inch tongue, the size of the middle piece needs to be 32 1/4 inch x 20 1/4 inch.
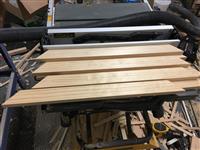
3) Cut your middle piece based on your calculated size (Figure01)
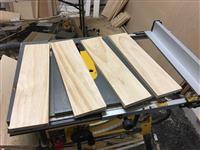
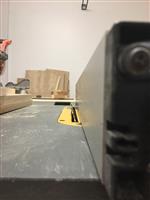
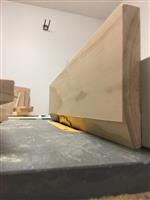
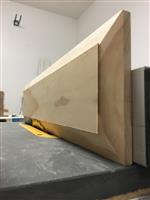
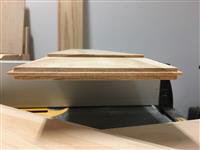
4) Set your table saw blade to 19 degrees (Figure02), make sure the blade leaves the edge when cutting the middle piece (that forms a rectangle). This is a good time to use your scrap wood for testing. For 3/4 inch thick wood, I set the fence to 9/16 inch. Figure03 shows what it looks like after one cut
5) Cut all 4 edges of the middle piece (Figure 04)
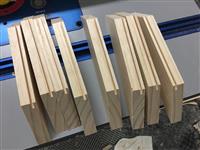
6) Use the table saw to trim the middle rectangle (as the edges are angled due to the 19 degree cut). Also use the table saw to make the tongue on 4 sides of the middle piece (Figure05, Figure06)
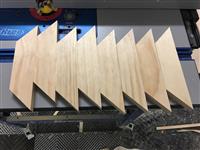
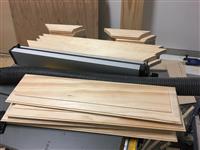
7) Cut the side pieces with precisely 45 degree angles. Even a one degree difference will leave a gap at the final assembly. The shorter side of the isosceles trapezoid needs to be precisely the length of the middle piece, minus the length for the tongue. For example: If I'm making a 36 inch x 24 inch cabinet door with 2 inch wide sides, the The shorter side of two of the the 45 degree isosceles trapezoid will be 32 inches, and the other two being 20 inch (Figure07, Figure08).
8) Use the table saw to make the dado/groove on the short side of ALL isosceles trapezoid pieces. The depth does not need to be precise as long as it provides enough space for the middle piece's tongue (Figure09).
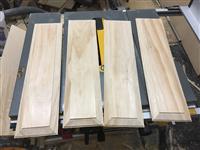
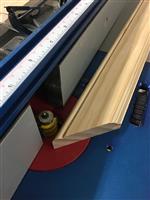
9) Use the router to make the design for the side pieces (Figure10, Figure11).
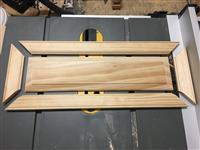
10) Assemble with wood glue (Figure13). Strap clamp makes it easy to hold all pieces together while the glue is drying (Figure14)
11) Once the glue is dried, use wood filler to fill any apparent gaps.
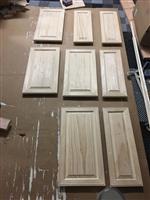
12) Sand & clean. Ready to apply finishing (Figure15)

Not-So-Good Comments

None

Overall:
Finished on:1/10/2017
Was Hired:No
Recommended: Yes
Why HomeHomeYeah Is Unique?
Views: 4060+   Is this review helpful?  

by Jin F. (Company User | Ranking:Homeowner)
Last update on 12/28/2016  

Services Provided

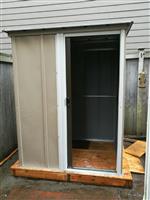
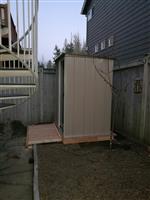
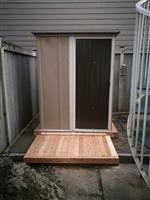
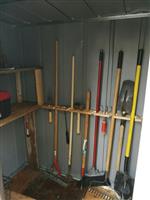
A small Steel Storage Shed

Experience and Good Comments

I decided to have a Storage shed to free some space in the backyard. since my backyard is small, I just need a small shed. And my friend bought me one as a gift:
Arrow Shed BW54-A Brentwood 5-Feet by 4-Feet Steel Storage Shed https://www.amazon.com/dp/B0015ZZM8Y/ref=cm_sw_r_em_apa_-jjvybDFQY60B

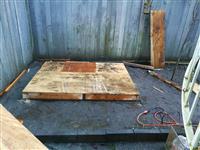
So, what I need to do is installment. I got some wood for the base(free), and there are some good video on YouTube about how to build a base. It took me totally about 2 days to build the base and install the shed on it, quite a lot of work!

Not-So-Good Comments

Assembly of the shed is quite complicated and time consuming. The steel wall is thin, but it is OK considering its price:) Used it for a few weeks and I found it is leaking in raining days...

Overall:
Quality:
Price:
Professionalism:
Service Cost $ Log on to view it
Finished on:12/17/2016
Was Hired:Yes
Recommended: No
Why HomeHomeYeah Is Unique?
Pictures
Views: 4540+   Is this review helpful?  

by Ding L. (Company User | Ranking:Homeowner 2)
Last update on 12/28/2016  

Services Provided

The service provider was not hired.

Experience and Good Comments

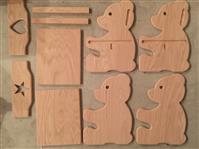
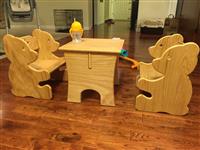
I saw someone on the internet made a bear chair & table set and immediately fell in love with them, thus I decided to make a set for my son.

Outcome:
- A very happy son
- A very happy wife
- Bragging rights

Cost:
- about $30 (a single sheet of 4x8 plywood is $50, used half of the sheet; spray lacquer is about $5)
- About 2 days (day 1 = cut & glue; day 2 = sanding & finishing)

Tools used:
- Table saw (to break down the sheet of plywood into small pieces. A circular saw can also do the trick if you don't have a table saw)
- Jigsaw with clean cut blade (to cut first bear which was used as a template, also to cut the star & heart shape in the middle, as well as the back support profile)
- Clamps
- Router with flush bit (to duplicate pieces, and to cut dados)
- Router with round over bit (to smooth out the sharp edges)
- Hand drill with forstner bit (to make the eye of each bear)
- Random orbit sander with 80 & 120 grit sand paper (smoothing the surface)
- Wood glue
- Spray lacquer (multiple coats spray-on. Make sure the lacquer you bought is child safe when cured)
- 400 grit sand paper (to make the lacquer silky smooth)
- Tack cloth (final dust removal & wipe off)

Major steps:
1) Print out the template on multiple sheets of paper and glue the paper together. use double sided tape to glue each template onto the plywood
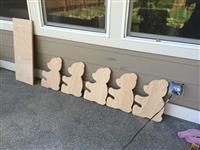
2) Use a jigsaw and carefully cut the outline of the bear. Make sure this piece is the way you like it because the next 4 pieces will be 95% identical to this first piece (in other word, imperfections from this template will transfer to the final pieces).
3) Clamp the template on top of a piece of wood that fits the full size of the bear, and use a router + flush bit to cut away. The product should be 95% identical to the template (sharp transitions on the template will be transformed by round corners, the size of the round corner depends on the diameter of the flush bit)
4) Repeat step 3 three more times
5) Drill the eye of the bear on to the template, and use this template to drill the eye at the same location for the rest of the 4 bears. ** TIP**: be sure to clamp a sacrificial wood on the underside (where the drill will exit). This is to protect the underside wood veneer from being crushed or lifted as the drill big comes out.
6) Cut the pieces for back support, seat top, seat support beam. Additional profiling and/or designs can be done on the back support piece if desired.
7) Use a round over bit with a router to smooth out the sharp edges
8) Trace the side of the back support, seat top, and seat support beam to the template. this will give a good idea on how long the dado should be.
9) Use a 3/4 flush router bit to make the dados. Make sure to completely cut through the template so that the dado location can be transferred to the final 4 pieces of the bear
10) Use a 3/4 flush (with bearing) bit to transfer the dado onto the 4 final bear pieces
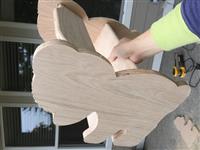
11) Glue all pieces together, make sure to check 90 degree angles
12) Sand the surfaces and round edges to remove any sharp points
13) Wipe the pieces with tack cloth to remove any dust
14) Spray lacquer onto the pieces. Spray a new coat every 10 minutes. Spray 3~5 coats.
15) Let the lacquer dry (about an hour)
16) Use 400 grit sand paper to smooth all surfaces, wipe off the dust with tack cloth. Surface should be very smooth at this point
17) Apply a final coat of lacquer, let all pieces cure for 24 hours
18) Make the table (relatively easy compare to the bear chairs)

This location has a Sketchup file available for download, you can download it and print out the bear design.
http://www.instructables.com/id/Bear-chair-and-table-set-for-kids/?ALLSTEPS
download: "bear-chair-table-plans.skp"

Note the person on the website used dowel for stronger joints. I chose not to because I felt glue is sufficient enough, and it's much easier without using dowels :P

Not-So-Good Comments

None

Overall:
Finished on:9/23/2016
Was Hired:No
Recommended: Yes
Why HomeHomeYeah Is Unique?
Pictures
Views: 4550+   Is this review helpful?  

by Bo y. (Company User | Ranking:Homeowner)
Last update on 12/22/2016  

Services Provided

My furnace stopped working.

Experience and Good Comments

Original: 家里furnace 风扇不转了。
1. 用gas的热水器正常工作所以不是gas问题。
2. 换了新filter,还是不转。
3. Thermostat 是ON, 听得见Furnace工作的声音,检查Furnace看得见火, 用手摸是热的。但是出风口没有风。
4. 把circuit 关掉打开,还是不转,所以应该不是circuit断电问题。


1. 找了很多家报价更换新的furnace, 报价从2k to 5.5k 不等, homehomeyeah 上推荐的厂家报价最靠谱,但是厂家生意太好太忙了,安装时间排到几天之后。
2. Furnace 95% 和 80%: 主流都是80%, 95%虽然有PSE折扣,但是成本更高,安装工序也更复杂,连排风管的材料都不能用金属的,总体来说得不偿失。 可以想象以后维护也更麻烦。
3. 好朋友提醒,Furnace寿命在20年以上, 这东西技术含量真不高,结构简单,甚至比组装电脑容易多了。 新的furnace 和老的furnace比优势非常微弱。
4. 进一步研究发现, furnace需不需要更换的指标是 heat exchanger有没有腐蚀,因为heat exchanger是跟frame一体的,它的更换成本跟换整机的成本一样。 我们家的furnace13年,以前用的没觉得什么不好,也没什么噪音, heat exchanger良好。
5. 所以就决定不换只修。 找人报价修 $500 到 $800 不等。 如果修的报价超过 换的报价的25%, 就不要找人修了,因为修了后可能不久又坏了, 而换会有10年的质保。
6. 于是抱着试一试的心态,在小伙伴们帮助下, 拆机。 新的马达要$200, 马达上的电容 $10.
7. 花了$10到买了一个电容,换上去,Bingo, furnace恢复正常。

Translation by HHY: My furnace stopped working. I did some diagnostics.
1. the gas water heating was working so it should not be due to gas supply.
2. changed new filter. it still didn't work.
3. I could hear furnace running. I could see the flame. but there was no warm air coming out.
4. turn off the power and turn it on. still not working.

More info as below
1. I got many quotes on installing a new furnace. The quotes were from $2000 to $5500. The service providers on homehomeyeah provided reasonable quotes but they were too busy and I needed to wait for a few days.
2. Furnace efficiency (95% and 80%):the mainstream is 80%. there is PSE rebate for 98% one but it is more expensive. The vent pipe can't be metal (normally PVC). I can imagine that the maintenance of 95% furnaces is more work compared to 80% furnaces.
3. Got info from friends that the lifespan of furnaces is 20yrs. It is not high tech. New furnaces don't have many advantages compared to old ones.
4. I found that if a furnace should be replaced depends of if the heat exchanger should be replaced. My furnace is 13yrs old. It is not noisy and the heat exchanger is fine.
5. I decided to repair instead of replace. the cost is from $500 to $800.
6. I decided it to do it myself. The new motor has a rough cost of $200. The capacitor on the motor costs $10.
7. Before replacing the motor I decided to just replace the capacitor to see if it works. Bingo, it works!;

Not-So-Good Comments

None

We encourage users to write reviews in their first languages.

Overall:
Quality:
Price:
Professionalism:
Service Cost $ Log on to view it
Finished on:12/19/2016
Was Hired:Yes
Recommended: Yes
Why HomeHomeYeah Is Unique?
Views: 4450+   Is this review helpful?  

by Ken W. (Company User | Ranking:Homeowner 2)
Last update on 12/13/2016  

Services Provided

Whole House Humidifier Installation

Experience and Good Comments

Original: 每到冬天暖气运行得多了就觉得家里很干。虽然有个小型加湿器,但覆盖范围有限,频繁加水也令人感到厌烦。正好感恩节假期没有别的安排,我就利用这段时间进行了一个home improvement project - 安装全屋加湿器。

先说说结论吧,到今天加湿器已经安装了半个月了,基本上效果还是很明显的,之前晚上我在书房时间久了就会口干舌燥(因为书房没有加湿器),现在基本没什么感觉。尤其是这两天晚上外面气温比较低的时候,加湿器就运行得比较频繁。之前晚上室内湿度经常降到30%出头,现在基本上保持在43%左右。总体来说我对这个项目的效果很满意。

1. 加湿器选择
在亚马逊上稍微搜索一下,不难把目标锁定在Aprilaire的几款Whole House Humidifier上。我主要在500和700之间做了选择,700的优势是不需要bypass duct,安装容易,但是要贵$100+。我研究了一下furnace和AC的布局,感觉装bypass duct应该没有问题,所以选择了500。没有考虑600是因为500的cover面积已经足够。

提醒:根据Aprilaire的声明,他们的加湿器如果不是由专业人士安装,5年保修将会失效。

2. Bypass Humidifier原理
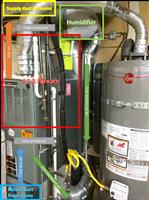
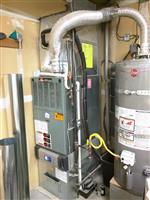
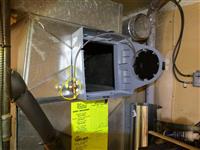
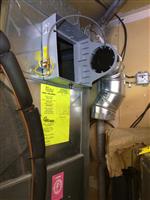
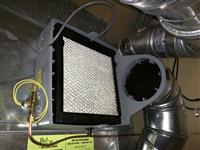
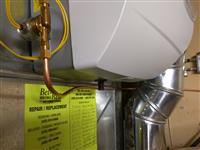
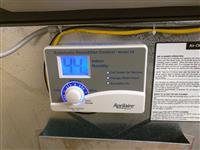
我根据安装完成的照片加了一些说明,简单来讲就是依靠blower前后的压力差,使得一部分加热后的空气进入加湿器,加湿后通过bypass duct回到blower之前的管道,再次经过furnace最后进入各个房间。加湿器和bypass duct的位置是可以对调的,也就是说可以让热空气从bypass duct进入加湿器正面然后吹入return duct。

3. 计划
首先确定安装位置,需要在duct上切开3个部分:加湿器是一个方形9 1/2" x 9 1/2"开口,bypass duct是一个圆形6"开口,还有一个3/4"的小孔是给控制器用的,控制器必须装在return duct上,并且在加湿器或者bypass duct上游至少12"远。
设计好安装位置和管道接法后,大致量出需要的管道长度,去Home Depot采购一番。

4. 材料:
- 加湿器、控制器
- Duct pipe(可以选择Sheet Metal Pipe或者Aluminum Foil Duct,后者安装简单,但我选择前者,因为比较牢固可靠,看起来也更舒服)
- #8 1/2" sheet metal screws
- Foil duct tape
- 1/4" OD Copper Coil(进水)
- Saddle valve(加湿器附带)
- 1/2" PVC pipe, pipe bracket(排水)
- Thermostat wire or other qualified wire(控制器接线)
- Low voltage wire(户外温度传感器接线)
- Wire nuts
- Gas vent pipe(我需要挪动一下furnace和water heater的vent)

5. 工具:
- 电钻(钻孔、上螺丝)
- 能切割duct的工具比如reciprocating saw, jigsaw或者angle grinder等
- 扳手
- 剥线钳 (wire stripper)
- 水平仪 (level)
- Pipe cutter
- 12" drill bit(钻墙安装户外温度传感器)
- PVC Primer and Solvent(没有也没事,因为排水管不加压)
- 护具。进行下面的步骤时务必戴眼镜。Always wear eye protection when doing any of the operations below.

6. 准备工作
首先把AC和furnace的电源和gas切断,我要挪water heater的vent,所以也把water heater 关了,然后拆开vent pipe。

7. Duct work
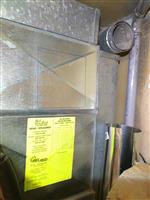
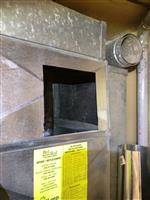
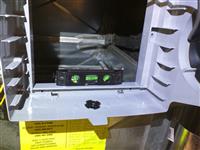
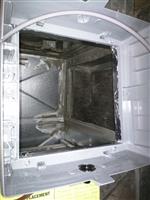
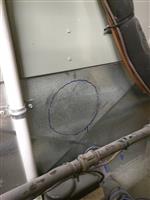
在duct上画好要切的口子,切开需要的大小,把加湿器的外壳塞进去。试了一下几个工具,感觉jigsaw切起来比较顺手。这里一定要用水平仪确保外壳安装是水平的,否则水只会流经water panel的一部分区域,加湿效率会打折扣。在加湿器的螺丝孔位置用记号笔标记,用电钻钻好孔,再用sheet metal把加湿器外壳固定。接下来可以用foil duct tape从duct内部把加湿器外壳和duct间的缝隙密封起来防止将来热气泄露。

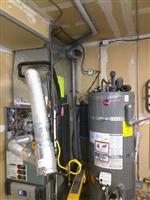
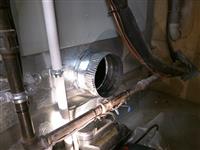
接下来把bypass duct的6"圆形也切好,装入一个6" starting collar,同样用foil duct tape密封,然后就想方设法用管道把它加湿器侧面的圆形口子连接起来。我这里用了一根60"的直管加5个弯头(因为要绕过AC的管道)。这里Home Depot的90度可调节式弯头帮了很大的忙,基本可以扭成任意角度。全部接好之后看看哪些地方有缝隙的,一样用foil duct tape密封。这时候把加湿器里面的water panel装好,并把外壳盖上。之前拆开的furnace和water heater的gas vent,我把它们延长了一段重新接好。

最后在return duct上选择的安装控制器的位置钻一个直径3/4"的孔,把控制器上的圆形传感器部分对准,然后用螺丝固定,确保橡胶垫圈没有缝隙。

8. Plumbing
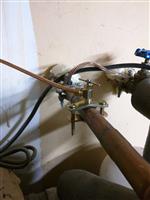
Plumbing包括两个部分,进水和排水。前者使用1/4" OD Copper Coil,说明书推荐和热水管连接,并随加湿器带了一个saddle valve。Saddle value安装简便,但不是一个很长久的选择。我先暂时用着,准备将来换成angle value。把Copper coil切下需要的长度,弯成合适的形状,两头分别插入电磁阀和saddle valve的接口,用扳手拧紧。当心不要弯的太过,可能会使管道变扁甚至漏水。

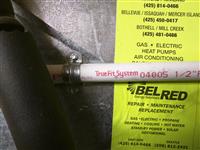
排水管需要使用1/2" PVC pipe,如果附近没有下水管道,排水需要动一番脑筋。幸好我的AC本来就有drain pipe和一个pump,我就新切了一段PVC,用一个tee fitting把他们接起来。这里要当心因为排水是不加压的,所以尽量保持管道持续下降以免积水。最后用了个pipe bracket把管子固定在duct上。

9. Electric wiring
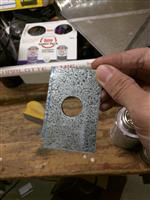
最后接线部分比较straight forward,基本上把furnace的外壳打开,找到thermostat的线,照着说明书上的线路图接起来就是了。需要注意的是这里不建议直接取用blower的24V电源驱动电磁阀。加湿器附带了一个24V的AC-AC变压器,只是要求装在metal box里,也就是furnace的外壳里面。我从切下的duct上切了一小块,在中间钻了3/4"的孔把变压器固定在上面,然后把这块铁片固定在furnace里面的一个anchor上。

控制器上的两个ODT口要接一个户外温度传感器,用一个12"长的drill bit在车库外墙上开个小孔,把传感器固定在外墙阳光不会直射的地方,然后用low voltage wire沿墙走线接到控制器上。如果把siding钻坏了的话,补一下漆。

线接好后用几个线卡把它和我原来的电子过滤器的线捆在一起,整理整齐。

10. System test
打开saddle valve和加湿器的damper,按照说明书上的步骤,加电测试,检查是否漏电漏水漏气。居然一遍跑过,比我写的代码靠谱多了。

Overall Cost: ~$200
- Humidifier: $146.9
- Pipes, screws, tape & misc: ~$50

Translation by HHY: It feels dry during winter. I have a small humidifier at home but it only covers limited area and adding water frequently is tiring. I did a home improvement project during Thanksgiving to install a whole house humidifier.

1. Choose a humidifier

2. How Bypass Humidifier works

3. Plan

4. Materials

5. Tools

6. Preparation

7. Duct work

8. Plumbing

9. Electric wiring

10. System Test

Overall Cost: ~$200
- Humidifier: $146.9
- Pipes, screws, tape & misc: ~$50;

Not-So-Good Comments

Original: 买加湿器的时候没有注意到有手动控制版(M版),因为我后面打算把加湿器接入家里的无线控制网络,所以其实手动控制版对我来说就够了。

Translation by HHY: I didn't realize that there was manual control version when buying humidifier. I planned to connect my humidifier to my wireless network so M version was good enough.

We encourage users to write reviews in their first languages.

Overall:
Quality:
Price:
Professionalism:
Service Cost $ Log on to view it
Finished on:11/27/2016
Was Hired:Yes
Recommended: Yes
Why HomeHomeYeah Is Unique?
Views: 5230+   Is this review helpful?  

by Yan W. (Company User | Ranking:Homeowner 2)
Last update on 12/12/2016

Services Provided

[Private to Microsoft Homeowners] How to join | How it works

Experience and Good Comments

[Private to Microsoft Homeowners]

Not-So-Good Comments

[Private to Microsoft Homeowners]

Overall:
Quality:
Price: [Private]
Professionalism: [Private]
Finished on:2/1/2016
Cost:[Private]
Was Hired:Yes
Recommended:[Private]
Views: 110+
 
Why HomeHomeYeah Is Unique?
Pictures

[Private]

Views: 110+   Is this review helpful?  

by DIY M. (Company User | Ranking:Homeowner 2)
Last update on 12/05/2016  

Services Provided

Buying and selling on Craigslist

Experience and Good Comments

We all have great and bad experiences. I have met some wonderful folks doing smooth transactions and have also been scammed several times.

Personally, I have sold and purchased 100's of items on CG and several more than $1K each. I give away a lot of items for free as someone could use the item and easier then trashing.

Few things I would love to share :

1. Install a phone dailer app on your phone (like TextNow or Talkatone) and get a FREE phone number. This will help dispose the phone number if needed.
2. Identify a new name for yourself (like John Doe)
3. Create a new email account and use this for all CG interactions.
4. Never share your real name, address, phone number, email address with anyone unless absolutely necessary.
5. Always meet buyers at a nearby public location (like Subway etc). When you are selling a large item, meet them at a public location and ask the buyer to follow you to your home.
6. Take caution if a seller gives you their address. Avoid knocking on the door of sellers. Text them that you reached and if they can meet you outside.
7. If buying something, always carry the exact change in cash. If selling something take caution if seller is asking for change (there are several scams involving cash exchange).

Be smart and safe.

Not-So-Good Comments

Watch for scammers

Overall:
Quality:
Price:
Professionalism:
Service Cost $ Log on to view it
Finished on:11/1/2016
Was Hired:Yes
Recommended: No
Why HomeHomeYeah Is Unique?
Views: 4570+   Is this review helpful?  

by DIY M. (Company User | Ranking:Homeowner 2)
Last update on 11/21/2016  

Services Provided

Removing two trees

Experience and Good Comments

Didn't like the idea to chop down two perfectly healthy 20 foot trees close to the front porch, so started seeking alternatives.

If the trees are of resale value and can be removed easily with proper machines then bigtrees.com is an option. Sadly, these didn't fall into that category and bigtrees.com was not interested.

So, posted in CG under the free section. There were atleast 6 parties who were interested and two visited, but were not equipped to handle the beasts.

I posted a $100 reward for anyone who will take them and give a new home. Suddenly couple of people of were interested (before the CG flaggers did their job to remove the advt) and the trees are gone..... YAH!

Lessons Learned and things which helped :

1. http://call811.com/ There is no alternatives for this. I did the correct process, but they failed to identify that the cable line was going thru the roots. Cable got disconnected at 9pm, I was able to patch the line and will post here on how Comcast handles the repair process.

2. Identify a decent "No Harm agreement" and get it signed before the job starts. It didn't add value for this project, but error on the safe side.

3. Take all the necessary precautions for posting on CG. It's not an option when meeting someone at your home.

4. Plan for project duration & end time. The jobs was finally done at 11:30pm. No surprise that the person who took the trees was a Project Manager for a construction company :) and was very sorry for time estimates.

5. Inform neighbors and make them hide their toys (ie cars). Nothing got damaged and was lucky to have nice neighbors who were understanding and moved their cars.

5. Tree removal is a big mess project. Plan sufficient time for cleanup. It rained before I got the opportunity to cleanup, so it's going to interesting cleanup story.

****************************************************
Update (Day 3 after Tree removal) : Comcast visited and fixed the cable connections. No further damage found. Didn't charge for visit.
Update (Day 5 after Tree removal): Comcast visited again and buried the cable.

Update (Comcast) : Internet constantly disconnected several times during the day. It took several calls to Comcast for them to be convinced to send someone. The tech who visited was very patient and replaced the wire which went thru the tree roots and all connections from the street to the modem. (he mentioned that if the cable was ever pinched then it causes issue with digital cable & internet) FINALLY : we have stable internet.

More pictures when time permits.

Not-So-Good Comments

None

Overall:
Quality:
Price:
Professionalism:
Service Cost $ Log on to view it
Finished on:5/24/2015
Was Hired:Yes
Recommended: Yes
Why HomeHomeYeah Is Unique?
Pictures
Views: 6550+   Is this review helpful?  

by Life L. (Company User | Ranking:Homeowner)
Last update on 09/22/2016  

Services Provided

Original: 岛上安装油烟机和补气系统 Install Island Range Hood and Make up air system

Translation by HHY: Install Island Range Hood and Make up air system

Experience and Good Comments

Original: 今年花了不少时间来研究和安装抽油烟机,想在家里装一个类似商业厨房用的油烟机和燃气灶,彻底解决做饭火力和油烟问题。和朋友交流发现大家这类需求很强但是却没找到特别有用的文章介绍,所以希望这篇文章能帮大家节省一些时间。(文中提到的关于code的部分不同地区可能规定有差别)。

Island油烟机的选择:
1) 大小尺寸:一般来说,罩子大一些,深一些效果好。和cooktop相比,island cooktop左右各多出3-6 inch,靠墙油烟机左右各多出1-3 inch就行了。我的island cooktop是36“的,考虑到实际使用习惯(有时旁边会用电磁炉蒸东西)等,最后选择了48宽度的油烟机。
2) 风力(CFM):如果厨房空间比较独立密闭,600CFM足够了。这边大多数美式开放厨房如果中餐爆炒的话,要CFM 900才行。否则做完饭屋子其它地方总会是有油烟味的。当然1200,1500更好,但更难安装。大CFM除了全速开启抽力更大外,开低速也更安静。为了实现炒菜完全无油烟,我最后选择了1200CFM宽度48”的油烟机。
3) 管道要求:CFM 900以上的油烟机基本上是8“,10”管道或者双6“管道。不一定都能安装。管道尺寸一定要按照油烟机的要求,不要降级管道尺寸,否则会影响抽风效果,噪音也会变大。
4) 清洗方便:油烟机一般都带收油网,避免选择那种细密的小孔滤网,很容易堵(流行的妈妈乐之类的很多用这种),还有一种是Baffle全不锈钢大网,商业厨房里面很常见,这种直接放洗碗机里洗也很方便。最后还有一种是vent a hood这个牌子用的,没有滤网,这里有介绍 https://www.youtube.com/watch?v=PAMKlQ930TY
5) 其它功能比如延时关闭,led照明灯等也可以考虑
6) 网上流行的神器一二代都是Wall Mount Range Hood,神器三代不错,但是要求10寸管道,我无法安装,所以也没能用上。

补气Make up air (MUA)的说明:
1) 按照code,CFM 400以上就要安装MUA(所以市面上有一些油烟机型号CFM 390)。这是为了防止一氧化碳废气从壁炉,车库等地方抽回到房间里中毒。另外由于负压,加上房子本身也不是完全密封的,所以也会从其它地方比如crawl space抽空气进来。所以才有此规定。
当然,做饭的时候开窗开门效果也一样,只是不符合code,除了容易忘记开,冬天也会很冷。装了MUA效果上就相当于做饭时自动开关窗户了。
2) 所以,除了安全上的考虑之外,为了让整个项目符合code,安装大CFM油烟机的话MUA是必须的。
3) 按照code,油烟机和MUA需要interlock,我用的就是Broan这一款http://www.broan.com/products/product/54c86827-80d3-4c51-bedb-fd57637ec7ab 可以适用多数油烟机。原理上就是通过气压传感器,油烟机抽风时管道内的气压变化触发24v电路控制步进电机打开管道中的damper,让新鲜空气从室外倒抽进来。油烟机关闭,电路切断,damper在弹簧的作用下复位关闭。


材料购买清单:
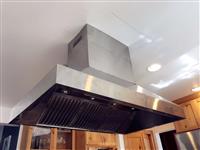
1) 油烟机Proline 48" Stainless Island Hood PLZI 697.48, 1200cfm http://www.prolinerangehoods.com/index.php?main_page=product_info&cPath=31_43&products_id=416
a. 这款油烟机一共4档风速,一档400CFM非常安静(和冰箱压缩机运行时差不多),炒菜用到3档900CFM就足够用了,4档几乎没用过。
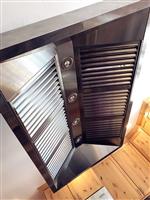
b. 油烟机有6块全不锈钢的Baffle滤网,可以直接洗碗机洗。
c. 带3分钟自动延时关机
2) 补气系统控制器Broan MD8TU 8" Universal Make-Up Air Damper https://www.build.com/broan-md8tu/s607809
3) 油烟机外墙出风罩8” wall cap,这个一定要买好的,不要买那种薄的罩子,刮风时会被吹的呼啦啦响。我买的是Vent-A-Hood VP528 https://www.build.com/vent-a-hood-vp528/s742289
4) 补气系统外墙进风罩, 这个需要带网格,我买的Galvanized Steel 8" Round Rain Proof Fresh Air Wall Inlet Cap https://www.build.com/zephyr-ak00032/s942122
5) 电线
6) 8” round duct pipe (具体长度根据需要买),8” 90-degree elbow(根据实际使用数量购买)
7) HVAC tape,silicon caulk,screw等


Island油烟机和MUA的安装:
1) 管道安装:
a. 首先要判断房子是否能安装管道。如果厨房上面是二楼卧室,管道只能选择走在夹层中。先要确定横梁的走向,并保证中间无障碍物(比如水管),然后选择合适的管道安装方式。
b. 我家的厨房的天花板和二楼地板之前大概有10”x 11”的空间,考虑到实际施工余地,就排除了需要10”管道的油烟机,选择了需要8”管道的油烟机。
c. 剩下的就是开墙,加管道。这部分本来准备自己做,后来由于缺少几种必要的切割工具,就请人做的。
d. 这里要说明的是管道尽量短,转弯尽量少(一个90度的转弯相当于5 feet的管道)
2) 电路:
a. 理论上,油烟机需要独立的供电。普通师傅安装的话可能就从附近的插座或者灯上分一根线来用。有个朋友家就是真么弄的,用油烟机要先开灯…
b. 我这个找的专业电工做的,有专门的穿线工具,可以减少墙面开洞的数量
c. 控制MUA的低压线也在这个时候一起做好
3) 油烟机吊挂:
a. Wall Mount Range Hood通常挂在墙上,固定方式受力比较容易解决。
b. Island Range Hood只能吊装,所以固定的时候必须找到横梁的确切位置。这里有介绍几种安装方式 https://www.youtube.com/watch?v=Tr4VrAWKe3A
c. 油烟机所有部件在一起大约80磅,按照通常要求,吊装要能承受三倍自重才能稳固安全。吊装通常用的是螺丝,需要screw pullout strength能够达到这个要求。除了找到木梁的中心之外,螺丝的长度,螺纹,粗细都会有区别。这里有一些我当时查的资料(害怕没弄好,油烟机自己掉下来…)
i. http://www.9wood.com/files/rd_reports/screw_withdrawl.pdf
ii. http://diy.stackexchange.com/questions/20414/how-do-i-ensure-my-wood-screws-have-a-minimum-of-120-lbs-pull-out-or-shear-stren
iii. 最后用的#10 http://www.homedepot.com/p/GRK-Fasteners-10-x-3-1-8-in-Star-Drive-Bugle-Head-R4-Multi-Purpose-Wood-Screw-70-Pack-103137/203533431
d. 接线什么的很简单,稍微有一点电工知识就能搞定。
4) 补气系统安装:
a. MAU可以附加在HVAC系统上。但是一般家里抽油烟机和现有的HVAC系统隔得比较远,走线比较困难。同时按照code,gas锅炉里面的那个巨大的风扇必须启动(否则由于管道太长很难通过负压直接把空气带进来),好处是新的空气进入时会被加热,冬天不会房间突然变冷。
b. 另外一个方法是再开一个洞,最好和油烟机出风口不在一个方向,不然油烟又被抽回来了。这个进气口可以比较靠近灶台,这样能形成连续的气流墙,好处是炒菜的时候完全不会有任何油烟扩散出去。可参考这个设计https://www.youtube.com/watch?v=NsSvMB9bJeE 。我用的是类似这种的方式
c. 原则上来说,油烟机排风管道和进气管道适用同样的尺寸都可以,大部分情况下8寸的管道即可。

总结,安装完成之后效果非常好,煮东西一档400CFM足够(一档噪音非常小,类似于空调压缩机运行时的噪音),炒菜最多用到3档900CFM,4档基本没用过。炒菜时站在旁边也几乎闻不到油烟。

Translation by HHY: I spent a lot of time researching range hoods and its installation.

How to choose a range hood
1. Size:
2. CFM:
3. Vent Pipe
4. Cleaning Easiness:
5. Other features like delayed off, LED lights

Makeup Air System

Material List
1. Proline 48" Stainless Island Hood PLZI 697.48, 1200cfm http://www.prolinerangehoods.com/index.php?main_page=product_info&cPath=31_43&products_id=416
2. Makeup air system: Broan MD8TU 8" Universal Make-Up Air Damper https://www.build.com/broan-md8tu/s607809
3. Wall cap: Vent-A-Hood VP528 https://www.build.com/vent-a-hood-vp528/s742289
4. Galvanized Steel 8" Round Rain Proof Fresh Air Wall Inlet Cap https://www.build.com/zephyr-ak00032/s942122
5. Electrical wires
6. 8” round duct pipe , 8” 90-degree elbow
7. HVAC tape,silicon caulk,screw

;

Not-So-Good Comments

None

We encourage users to write reviews in their first languages.

Overall:
Quality:
Price:
Professionalism:
Service Cost $ Log on to view it
Finished on:8/15/2016
Was Hired:Yes
Recommended: Yes
Why HomeHomeYeah Is Unique?
Pictures
Views: 11500+   Is this review helpful?  

by Xun S. (Company User | Ranking:Homeowner)
Last update on 09/19/2016  

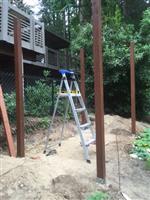
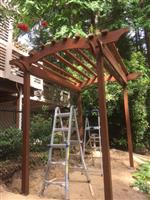
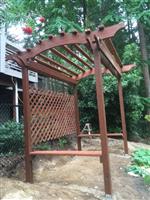
Services Provided

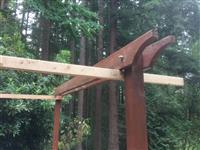
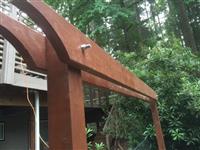
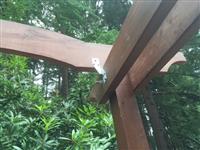
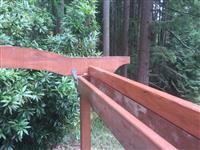
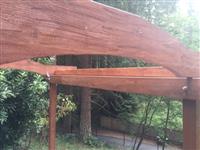
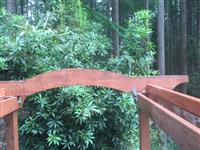
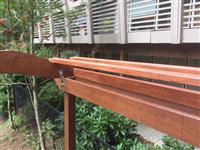
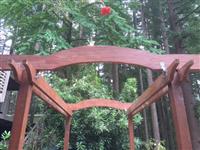
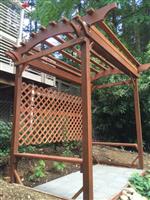
Original: DIY葡萄架

Translation by HHY: DIY grape arbor

Experience and Good Comments

Original: 简单写下夏天自己DIY葡萄架的经过。
1. 先是在youtube上搜索了很多其他人做的视频,关键字:arbor, pergola
好多不同的做法,设计也各有千秋,最后比较喜欢这个设计:
https://youtu.be/iweBSXh1cbo
其中很多边角的曲线设计感觉都比较好看,而且看视频也不是很难。
2. 设计,买料。先选了个搭架子的地儿,量尺寸,再去HD 看可选的材料,主要材料:
- 4x4x12 或10 支柱 4 根, 或者 4x4x8 + 金属支架,我用的金属支架,优点是容易固定,容易安装,柱子不进土,不易腐烂,缺点是貌似不是很稳,需要多加稳定梁,如果再做一个我会试试直接2些埋土里。
- 2x6x10 主梁4根
- 2x8x8 横梁两根,做端面曲线横梁
- 2x2x10 连接支架10根
- 螺栓/螺帽/垫圈 2“ x 6 4套, 2”x 12 4套,分别用在上下支架和主梁与支柱的连接
- 速成水泥(不用搅拌那种,直接倒进去浇水就行)
- 挖坑用的锹, 切割曲面的jigsaw,还有防水的油。
- 水平仪,稳定全靠它了。
- 90度支撑连接铁片

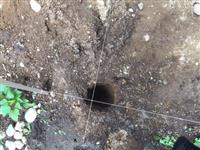
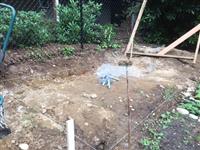
3. 挖坑,我挖了2尺深的坑4个,拉线,保持直线,填速成水泥,浇水,埋金属支架。用水平仪测量支架水平/垂直。等干。把所有木制材料刷油。
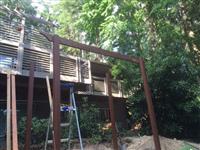
4. 安支柱,钻孔,装螺栓。用水平仪保持支柱垂直
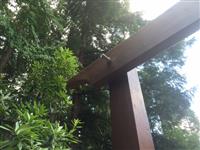
5. 主梁用jigsaw切角(圆弧) ,定位,钻孔,支柱上面定位钻孔,装螺栓。用水平仪保持横梁水平。我用的是每个柱子内外各一根,一共4根。
6. 端面梁切上下两段弧线。我没有软一些的木片,就用细线以大半径画弧。用90连接铁皮固定在支撑主梁上,
7. 钉上其他连接木条,完工。
后续,发现有些晃动,就在下面也加了片木板做椅子又在拐角处加了很多斜梁支撑。
又买了用来爬藤的格子支架,钉在一侧。

Translation by HHY: The below is what I did to make a grape arbor this summer
1. Watch youtube videos. Use arbor or pergola as keywords. There are different ways and designs of doing it. I like the design in https://youtu.be/iweBSXh1cbo
The curved corners look nice and it didn't look hard to do.

2. Design and buy materials. First pick a place in the backyard and do the measurement and then go to HD to buy materials as below
- 4x4x12 or 10 poles (needs 4). Or 4x4x8 + metal structure. I chose metal structure because it is easy to install and fasten. The poles don't go into the soil so it won't be rotten. The downside is that it is not very steady and it needs supporting beams. I would probably put the poles into ground if I do it again.
- 2x6x10 needs 4 of them
- 2x8x8 needs 2 of them. curved beam
- 2x2x10 needs 10 of them to connect the poles
- bolts, nuts and washers 2“ x 6 (needs 4), 2”x 12(needs 4)
- Instant concrete
- Shovel, jigsaw
- Level
- Metal brackets

3. Dig a hole. I dug 4 holes (2 feet deep)

4. Install poles, drill holes and install bolts.

5. Use jigsaw to cut the curved corner.
6. Cut other curves
7. Fasten other connector wood shims

;

Not-So-Good Comments

None

We encourage users to write reviews in their first languages.

Overall:
Quality:
Price:
Professionalism:
Service Cost $ Log on to view it
Finished on:8/19/2016
Was Hired:Yes
Recommended: Yes
Why HomeHomeYeah Is Unique?
Views: 6740+   Is this review helpful?  

by Paul L. (Company User | Ranking:Distinguished Homeowner)
Last update on 06/01/2016  

Services Provided

Install a storage shed in the far corner of the backyard

Experience and Good Comments

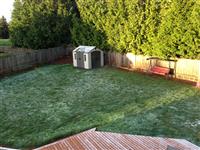
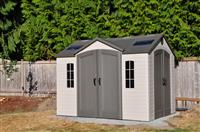
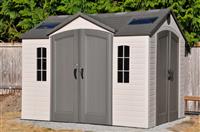
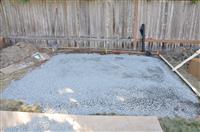
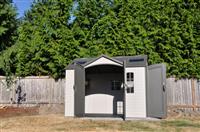
I decided to put up a storage shed so I can park both of my cars into garage. Three requirements: functional; nice-looking; zero wood. Did some research and decided to get lifetime 60001 8-by-10-Foot Outdoor Storage Shed from Costco ($1200). The good thing was that my backyard was relatively flat (not as flat as it looks though). I got 1 cf of gravel from a local supplier($151.6) since I don't want to use any wood. Building the foundation took a whole weekend with help from an experienced friend. Assembling the storage shed took more than a week (much more than what I expected) since I don't have much time per day. In the end all my requirements have been met and today it is as solid and beautiful as in 2012.

Update on 6/1/2016
Got gravels from http://877joebark.com
$ 40.00--1 yard of 5/8" Minus Crushed Rock at $40 per yard
$ 15.95--1 quantity 12'x16' Reversible Polytarp at $15.95 each
$ 82.50--delivery/fuel charge
$ 13.15--tax
$151.60--total

Not-So-Good Comments

Assembling took too much time.

Overall:
Quality:
Price:
Professionalism:
Service Cost $ Log on to view it
Finished on:8/31/2012
Was Hired:Yes
Recommended: Yes
Why HomeHomeYeah Is Unique?
Views: 7220+   Is this review helpful?  

by Paul (Company User | Ranking:Distinguished Homeowner)
Last update on 05/23/2016  

Services Provided

Diagnose mold problem and water leak. Replace wax ring for 2 toilets.

Experience and Good Comments

5/19
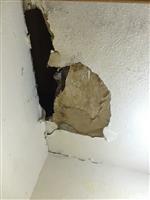
Found mold on the ceiling of the pantry. Didn't think much and thought that it might be caused by the moisture in kitchen. So I used the disinfecting wipers to remove them and then used hair dryer to dry the area. The drywall was a little bit soft and I didn't think that it was water leak. Yesterday the mold came back. I asked my fellow coworkers for suggestions and got detailed instructions.

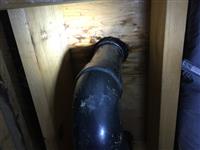
After work I tried to cut the drywall. Before that I used my hand to push the wet part and found that I could actually tear it down with one hand since it was soaked. Then I discovered that there is water leak from the top of the pipe every time there is a water flush. The black pipe itself does not leak. I checked the 2nd floor and didn't see anything. Now I am not sure if I can still proceed to do DIY to fix it. Will need to consult with my coworkers again.

5/21
Got advice from coworkers on 5/20 that it should be wax ring issue. Got the detailed steps form one coworker and also watched a couple of videos.

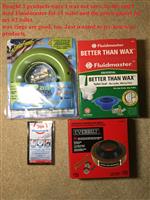
• Bought the green ring and liquilock from HD
• shut off the water supply to the toilet
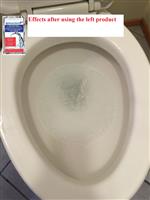
• Use a cup and paper towel to empty the toilet tank (not much water and I could use liquilock)
• Use liquilock to turn the water in the toilet bowl into gel
• Disconnect the tank from the bowl, and set the tank aside
• Undo the bolts at the base of the bowl
• Rock the tank to break the seal and move the bowl aside
• Remove the old wax ring using trowel (I happened to have the tool), Cleaned the area using clorox and replace the new green ring.
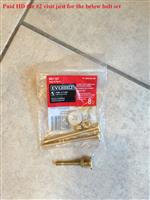
• Found the bolt set was not long enough. paid HD #2 visit
• Follow these steps in reverse to re-assemble everything
• Found it didn't work
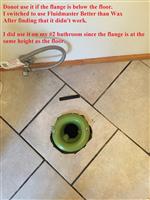
• Did quick research and determined that the flange was below the floor and the green ring didn't work in this case. Paid HD #3 visit and bought fluidmaster better than Wax and extra think wax ring (just case)
• Tried it again and it worked!


Also found the root cause. One bolt which fastens toilet to the flange was broken somehow.

Tip1: test before putting everything back. i.e. put the toilet bowel back without fastening and then test.
Tip2: it was not as messy as I thought. The wax ring just looked messy.

Later I found that my another toilet also had wax ring problem (very minor issue. when there is splash water around the toilet it turned yellow/dirty). So I fixed the #2 toilet using the green ring.

The green Sani seal toilet gasket $12.48
flange bolt set $3.96
Liquilock staty dry gel $3.27
Better than wx toilet seal $8.28
Extra thick wax ring $6.28

P.S. I am glad that I did this project. Now I am confident that I can fix most toilet issues and I can replace my toilets. If I called a professional that would be at least $200 and it would not be so fast. I learned important DIY skills within one day.

// I made this review detailed so even if you have never done this before like me you are not afraid of doing it.

Not-So-Good Comments

I should have cut the drywall when I first found mold.

Overall:
Quality:
Price:
Professionalism:
Service Cost $ Log on to view it
Finished on:5/19/2016
Was Hired:Yes
Recommended: Yes
Why HomeHomeYeah Is Unique?
Views: 5900+   Is this review helpful?  

by Paul (Company User | Ranking:Distinguished Homeowner)
Last update on 05/06/2016  

Services Provided

Plant vegetables, flowers and fruits

Experience and Good Comments

I already have 8X10 garden bed and decided to put more smaller garden beds to plant vegetables, flowers and fruits this year. I would like to use this to see how I am doing in 2016 so I can keep records and also learn from it in 2017.

4/2016: Late March- Early April. planted lettuce, Chinese cabbage, cucumbers, green onion, strawberry and grapes in 4x4 garden beds. cucumbers died in a week and got refund from HD. planted seeds (green beans, tomatos, ...) in 8x10 garden bed.

5/5/2016 plants are growing very well. ate Chinese cabbage twice already. Bought 3 more raised garden beds.

6/2016
7/2016

Not-So-Good Comments

1. buying plants is much more expensive than buying seeds
2. getting rid of grass is a lot of physical labor

Overall:
Quality:
Price:
Professionalism:
Service Cost $ Log on to view it
Finished on:4/18/2016
Was Hired:Yes
Recommended: Yes
Why HomeHomeYeah Is Unique?
Views: 5490+   Is this review helpful?  

by Paul (Company User | Ranking:Distinguished Homeowner)
Last update on 04/19/2016  

Services Provided

Lawn repair by overseeding

Experience and Good Comments

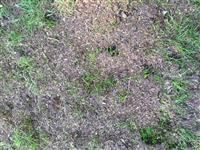
Last summer my lawn got burned due to a long vacation during summer. Fall is the best time to do overseeding but I can't wait so I decided to do it in late Mar.

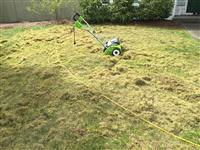
1. bought greenworks detatcher ($115.99+tax) from amazon and used it on my lawn. then did raking.
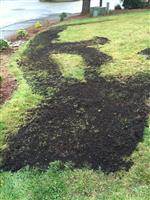
2. overseeding (bought the grass seeds from costco) and apply top soil (2 cu. ft. Topper Lawn Soil for Seed and Sod) bought from HD. Used 6 bags in the front yard. $6.47+ tax per bag
3. watering every other day.

It was a little bit cold. The new grass came out 2-3 weeks later.

Not-So-Good Comments

None

Overall:
Quality:
Price:
Professionalism:
Service Cost $ Log on to view it
Finished on:4/3/2016
Was Hired:Yes
Recommended: Yes
Why HomeHomeYeah Is Unique?
Pictures
Views: 5650+   Is this review helpful?  

by Paul (Company User | Ranking:Distinguished Homeowner)
Last update on 04/19/2016  

Services Provided

build 3 4x4 garden beds

Experience and Good Comments

There were 2 reasons why I did this. #1 plant some vegetables, fruits and flowers #2 reduce the grass area (my backyard is a little big so a lot of work).

The below was what I did
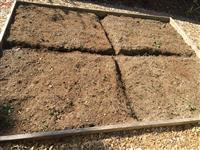
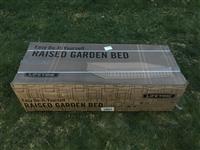
1. bought Lifetime 60069 Raised Garden Bed Kit, 4 by 4 Feet, Pack of 3 from amazon
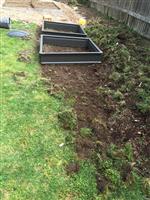
2. got rid of the grass and loose the soil
3. assembled the beds (very easy)
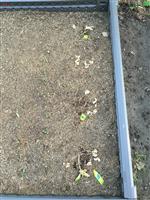
4. put garden soil (bought from HD) see picture.
5. planted lettuce,Chinese cabbage, cucumbers, strawberry, grapes, green onions.

Not-So-Good Comments

a lot of labor work on getting rid of grass.

Overall:
Quality:
Price:
Professionalism:
Service Cost $ Log on to view it
Finished on:3/26/2016
Was Hired:Yes
Recommended: Yes
Why HomeHomeYeah Is Unique?
Pictures
Views: 5450+   Is this review helpful?  

by Huan D. (Company User | Ranking:Homeowner)
Last update on 03/26/2016

Services Provided

[Private to Microsoft Homeowners,CHIME Homeowners Group] How to join | How it works

Experience and Good Comments

[Private to Microsoft Homeowners,CHIME Homeowners Group]

Not-So-Good Comments

[Private to Microsoft Homeowners,CHIME Homeowners Group]

Overall:
Quality:
Price: [Private]
Professionalism: [Private]
Finished on:3/18/2016
Cost:[Private]
Was Hired:Yes
Recommended:[Private]
Views: 310+
 
Why HomeHomeYeah Is Unique?
Pictures

[Private]

Views: 310+   Is this review helpful?  

by Huan (Company User | Ranking:Homeowner)
Last update on 03/23/2016

Services Provided

[Private to Microsoft Homeowners,CHIME Homeowners Group] How to join | How it works

Experience and Good Comments

[Private to Microsoft Homeowners,CHIME Homeowners Group]

Not-So-Good Comments

[Private to Microsoft Homeowners,CHIME Homeowners Group]

Overall:
Quality:
Price: [Private]
Professionalism: [Private]
Finished on:10/14/2015
Cost:[Private]
Was Hired:Yes
Recommended:[Private]
Views: 320+
 
Why HomeHomeYeah Is Unique?
Pictures

[Private]

Views: 320+   Is this review helpful?  

by Paul (Company User | Ranking:Distinguished Homeowner)
Last update on 03/23/2016  

Services Provided

Replace a broken fence post

Experience and Good Comments

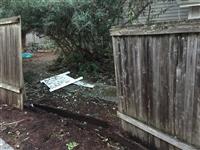
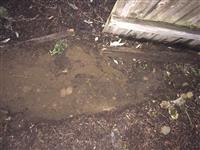
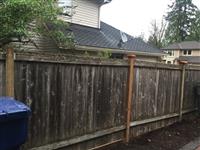
Did some research online and then went to Home Depot and bought the materials and tools (post, concrete mix, hole digger, nails, fence caps etc). It took me some time because finding them was not that easy and I asked at least 2 guys. First I detached the wood boards with the post and then remove the broken post. For safety I removed all the old nails from the broken post. However the concrete part was stuck there and I couldn't get it out. I will have to try next weekend ...

3/2016 Update (4 month passed)
Finally I had to ask for help. Another post was broken in the back and the neighbor behind my house recommended his landscaper and it took the landscaper over 4hrs to get this done (put the post on Sat. and put the panels and brackets on Sun).

Not-So-Good Comments

harder than what I expected. It was not one person job. I helped the landscaper since one man was not enough to put the panels back. Believe it or not putting the panel back took more time than putting up the new post because of alighment, brackets and rotten wood.

Overall:
Quality:
Price:
Professionalism:
Service Cost $ Log on to view it
Finished on:11/22/2015
Was Hired:Yes
Recommended: No
Why HomeHomeYeah Is Unique?
Pictures
Views: 5890+   Is this review helpful?  

by Ge L. (Company User | Ranking:Homeowner)
Last update on 02/05/2016  

Services Provided

DIY moss removal

Experience and Good Comments

Original: 在大西雅图地区的草地估计都比较多MOSS,感觉我的去除MOSS的经验有点用的,首先我会在初春或者晚秋的时候干这事,因为去除MOSS后还需要补种草。
首先我是去HD买了两袋moss killer,袋装固体颗粒状的,然后撒在草地上(当然不是手撒了,用Spreader),大概过一个星期后,用Dethatcher把moss都除掉(我是从amazon买了个greenworks的Dethatcher,不要尝试用耙子手动除,太浪费时间了,效果还不好),这个过程中会除掉一些草,然后撒上Lime(同样买自HD,感觉这个就是石灰,提高土壤PH值,普遍来说酸性土壤会长moss,所以这步很重要),隔上3天后就可以补种草种了。
通常来说,每年都要来这么一回,不然MOSS还是会越来越多。

Translation by HHY: It is very common for your lawn to have moss in Seattle. Normally I choose to do it early spring or late fall because overseeding is needed after removing moss.

First I would buy two bags of moss killer from HD and then spread it on the lawn using spreader. One week later I would use dethatcher to remove the moss (I bought greenworks detatcher from amazon. Do not try to do it using rakes. too inefficient). Then I would spread some lime and improve the PH value of the soil. 3 days later I can do overseeding.

Normally I need to do this every year.;

Not-So-Good Comments

Original: 自己干比较花时间,估计5000FT总共需要3-4个小时的样子,即使这样也是比请人便宜多了,就是需要自己一次性的投资买入Dethatcher。

Translation by HHY: DIY is a little bit time consuming and it took 3-4hrs to finish 5000 sq ft. However it is much cheaper compared to hiring out. You need to invest to buy dethatcher though.

We encourage users to write reviews in their first languages.

Overall:
Quality:
Price:
Professionalism:
Service Cost $ Log on to view it
Finished on:10/16/2015
Was Hired:Yes
Recommended: Yes
Why HomeHomeYeah Is Unique?
Views: 8220+   Is this review helpful?  


Did you hire For DIYers before?
If yes, please share your experience to contribute to the homeowners community. Write a Review Write a Comment

Flexible. Mainly materials
User comments on this service provider
    Provided Services: All DIY Home Services
    4.26 25

    AppStore PlayStore